Using Google API (gapi) in Chrome Extensions
Did you ever think “Website X would be so much better if it would have a button that would do Y”? I did it so many times. Like adding a download button for images or disabling notifications on LinkedIn.
If you want to add/change something basic, like a single button, there are a bunch of Chrome extensions that allow you to inject custom JavaScript (like this or this one).
But if you want to add something more complex, like:
- Cross-tab communication
- Data storage and sync across browsers
- Authentication with Google (or others)
then you’ll probably need to build your own extension.
This guide will help you build your own Chrome Extension and enable Google authentication. It will allow us using Google APIs to read and write data into services like Google Docs, Drive, GMail…
Why Google
It’s exciting to think about having your own data storage and server, but in reality each new component comes with a cost. Will you want to maintain your server 3 years down the line?
The only solutions that survived more than 2 years for my personal projects where based on reliable 3rd parties:
- Google Sheets and Drive
- Github Pages
- Dropbox
- Amazon Lambda
Any other solution that I built, inevitably vanished after a while because of continuous cost of maintenance.
Why Google API (gapi)
Google has a multitude of consumer facing products that can be used as an initial solution for small/medium projects.
For example - one may use Google Sheets as a database, and get out of the box:
- Simple and intuitive UI to manage the data
- Ability to create forms that populate the data (sharable to public)
- Ability to give read-only access to other people
- API and documentation available in multiple programming languages for reading and writing
Building your own Chrome extension
Follow it step-by-step to build your own extension that uses Google APIs.
Get started
Create a directory/folder for your extension. The full, completed extension can be downloaded from here.
Create manifest.json file:
{
  "name": "Extension with GAPI tutorial",
  "version": "1.0",
  "description": "Uses OAuth to connect to Google's Spreadsheet API",
  "manifest_version": 2,
  "browser_action": {
    "default_title": "GAPI Tutorial"
  },
  "background": {
    "page": "background.html",
    "persistent": false
  }
}
Create background.html file:
<html>
 <head>
  <title></title>
  <script src="background.js"></script>
 </head>
 <body></body>
</html>
Create background.js file:
chrome.identity.getAuthToken({interactive: true}, function(token) {
  console.log('got the token', token);
})
Get the extension key
To get the extension key, you’ll need to:
- Package the extension directory into a
.zipfile - Upload it to the Chrome Developer Dashboard:
- Sign in to dashboard
- Click Add new item
- Click Choose file and select the
.zipfile you created previously and upload it - Without filling in additional fields, select Save Draft and return to dashboard
- Find the extension under Items and click on it
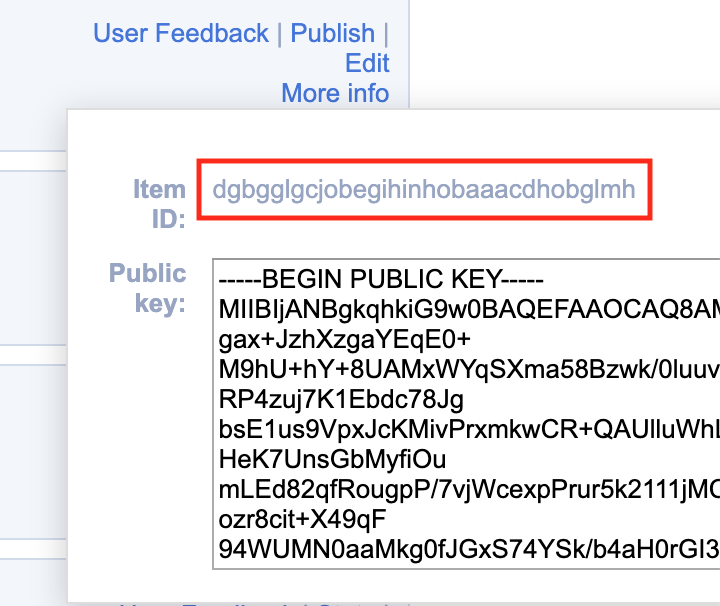
- On left-side pannel - choose Package and then View public key. Click on it.
- From the pop-up, copy the public key and add it to the manifest inside the unzipped directory under the
keyfield. You’ll need to remove the comments and edit it as to get a single-line string
  {
    "name": "Extension with GAPI tutorial",
  ...
    "key": "It_Should_Be_A_Very_Long_Key/0luuvR0cag46Yg9rEqrURP4zuj7K1Ebdc75JgbsE1us9VpxJcKMivPrxmkwCR+QAUlluWhLm/abzuyY4Z7izAsHeK7UnsGbMyfiOumLEd52qfRougpP/7vjWcexpPrur5k2111jMCdKSmXlFaR5dtC5Iozr8cit+X48qF94WUMN0aaMkg0fJGxS74YSk/b4aH0rGI3i9tzphqIH4OqUgi3iMDsBxRKbn40wQcBznioZXKCIA7NN0btn8NFqHqqCgP4iuro3BzlhBgXtHeQFNggGCqEMdUFfXlTuCUeLwIDAQCB"
  }
Make sure the key is correct
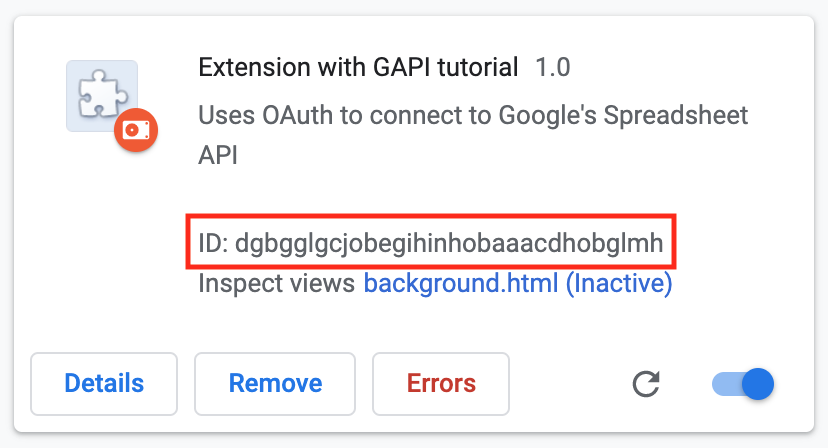
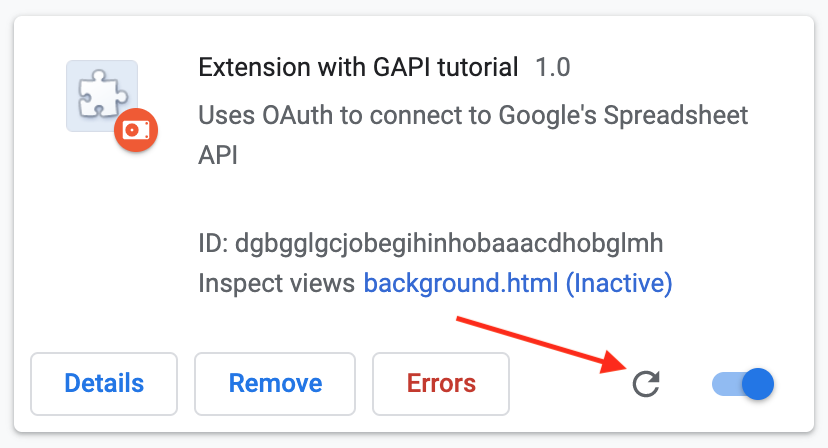
We’re going to load the extension and check its ID. If you have to go back few steps, don’t forget to reload the extension from Extensions Management page.
- Open Google Chrome browser
- Open the Extensions Management page at chrome://extensions
- Enable developer mode
- Click Load unpacked
- Compare the extension ID in Extensions Management with the one from Chrome Developer Dashboard. They should be the same
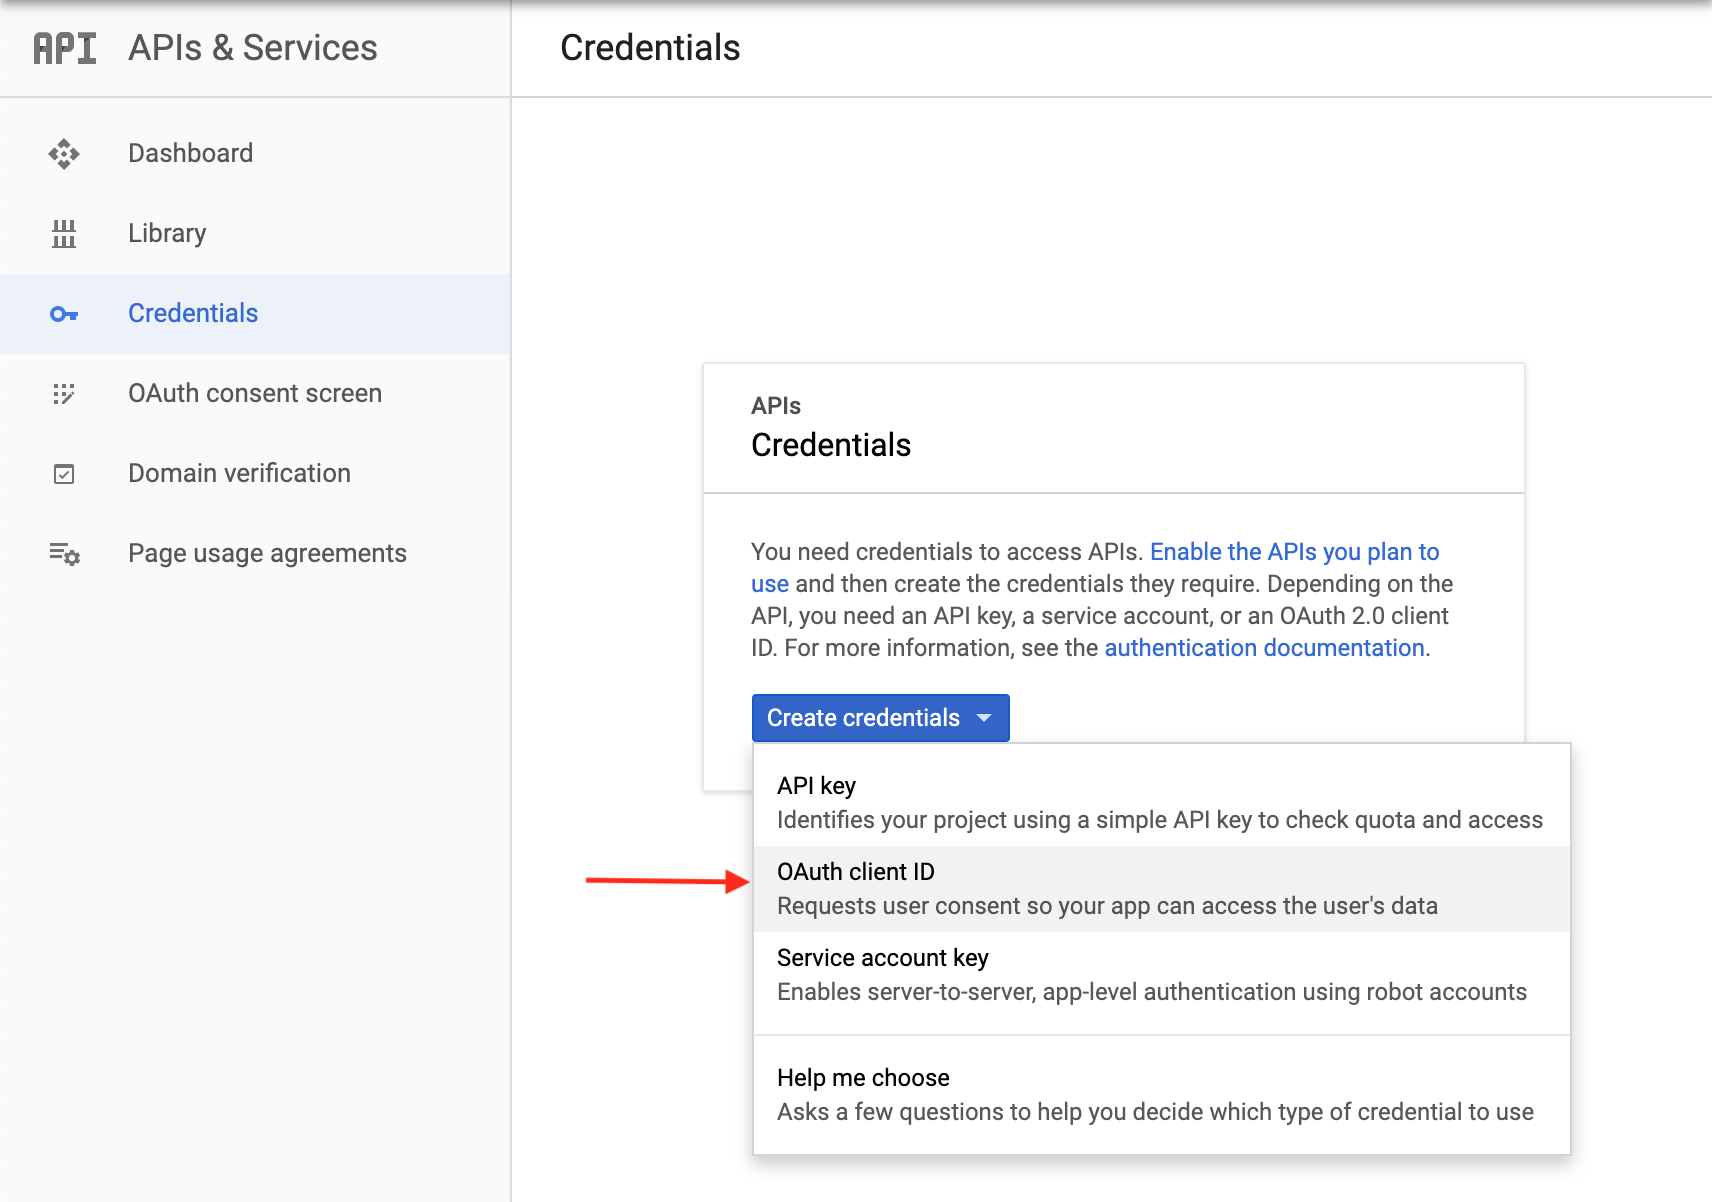
Create OAuth Client ID
Navigate to the Google API console and create a new project. Once ready, select Credentials in the sidebar, click Create credentials and choose *OAuth client ID**.
On the Create client ID page, select Chrome App. Fill out the name of the extension and place the extension ID at the end of the URL in the Application ID field.
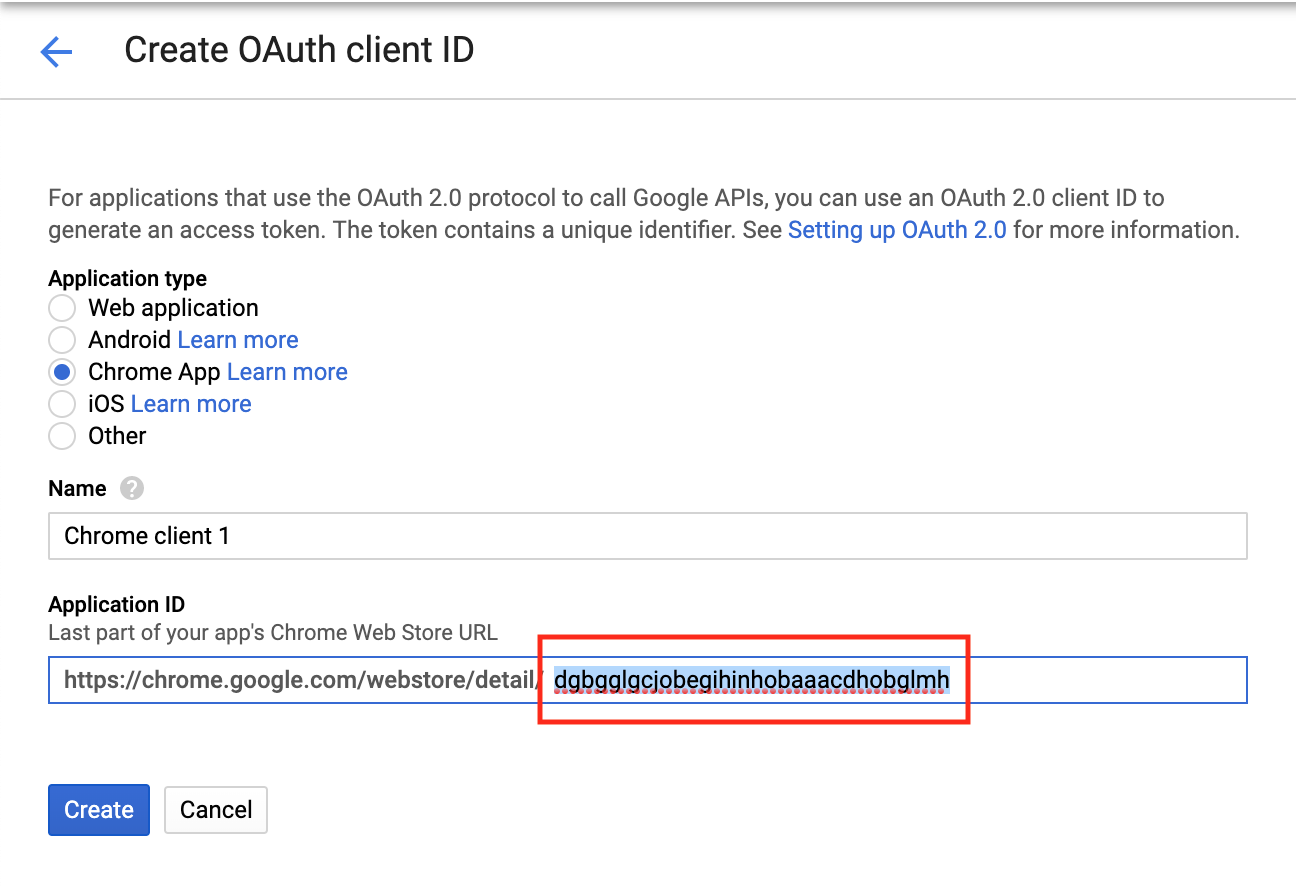
Finish by clicking create. The console will provide an OAuth client ID.
Register OAuth in Manifest
Include the "oauth2" field in the extension manifest. Place the generated OAuth client ID under "client_id". We’ll put spreadsheets as "scopes", but you can see full list of scopes here.
{
  "name": "Extension with GAPI tutorial",
  ...
  "oauth2": {
    "client_id": "Replace_With_OAuth_Client_ID.apps.googleusercontent.com",
    "scopes":["https://www.googleapis.com/auth/spreadsheets"]
  }
}
You have to reload your extension (different from page reload) every time you make a change to it. It’s located at Extensions Management. In half of the cases when something doesn’t work, it’s the extension not being reloaded.
Test if OAuth is working
Register the identity permission in the manifest:
{
  "name": "Extension with GAPI tutorial",
  ...
  "permissions": [
    "identity"
  ]
}
- Go to Extensions Management page
- Reload your extension
- Click on Inspect views __background.html__
A Google auth pop-up should show up during first time. Choose your account and after you sign in, you should see your token in the console.
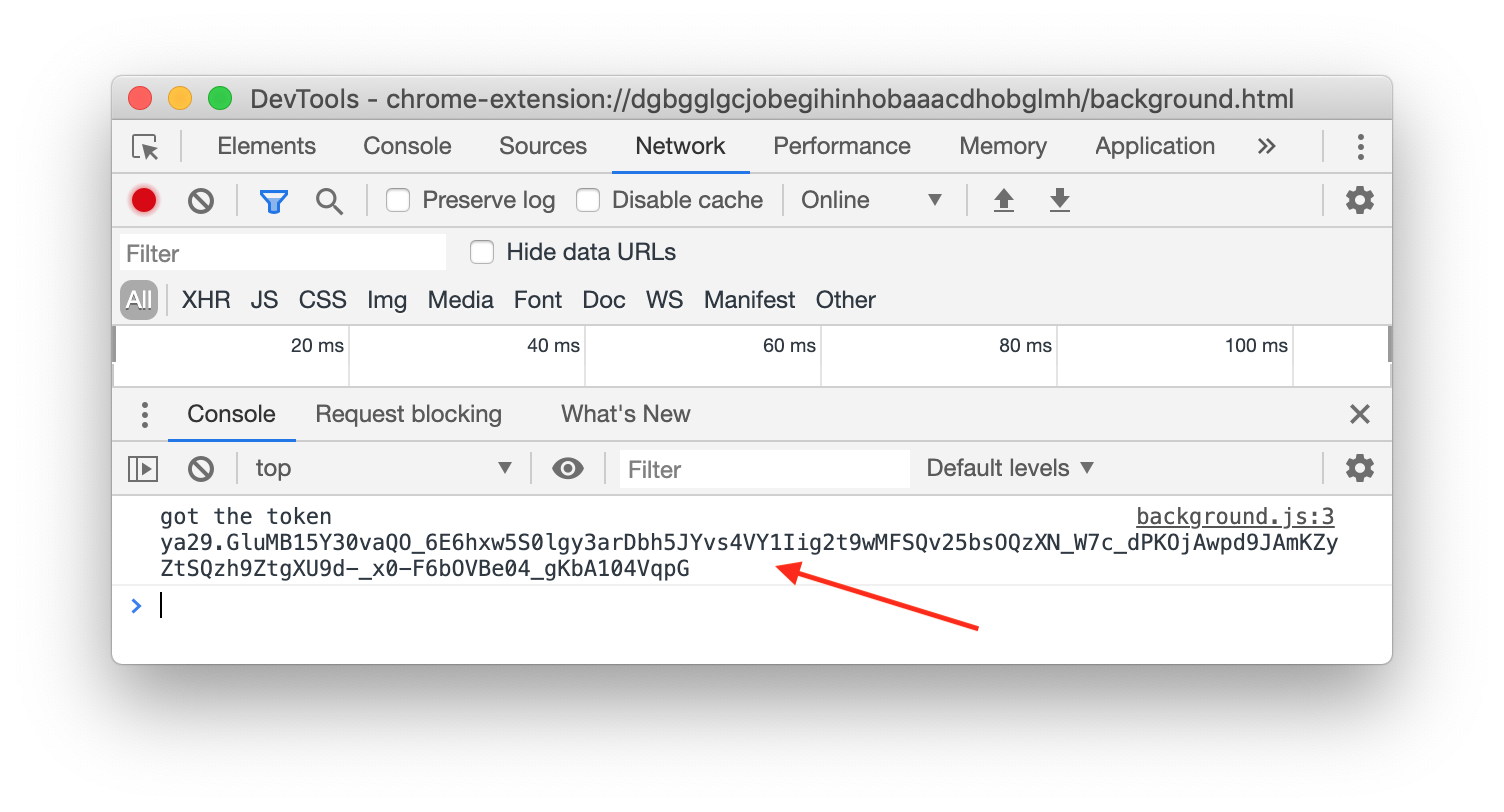
If you don’t see your token, then check that your Client ID and Extension ID are correct.
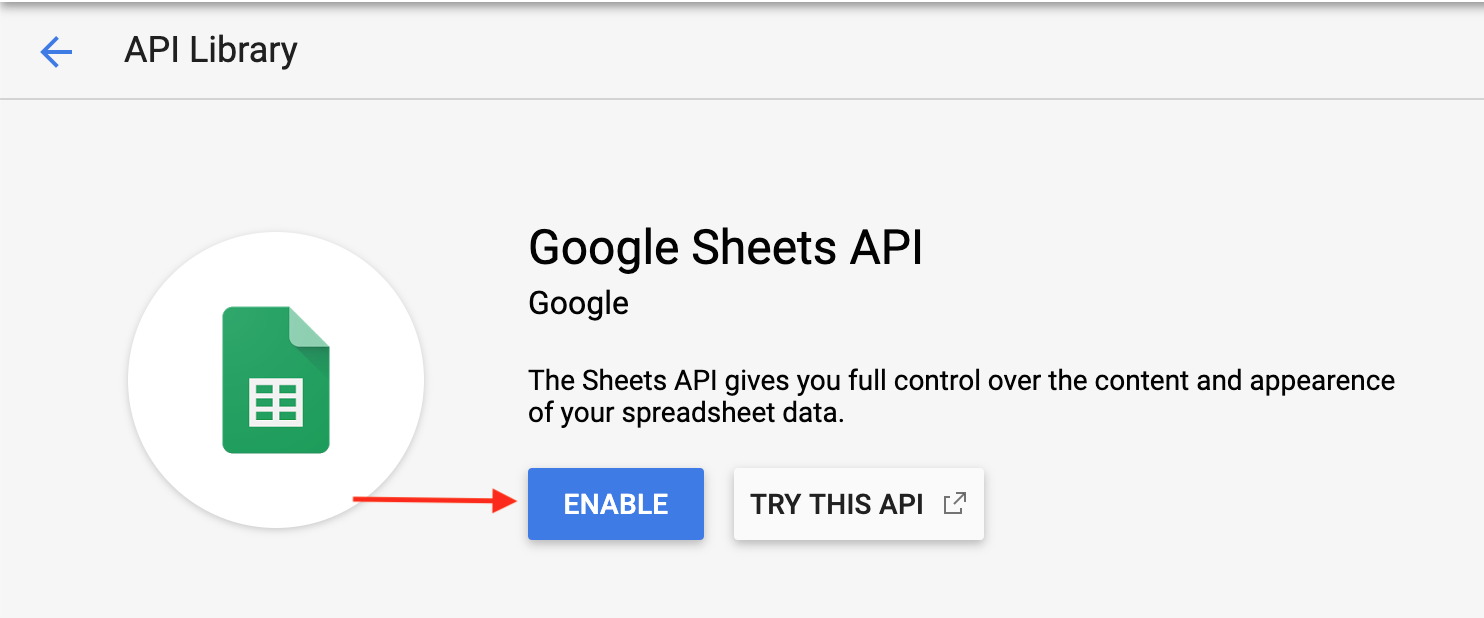
Enable the Google Spreadsheets API
Return to the Google API console and select Library from the sidebar. Search for “Google Spreadsheet API” and enable it.
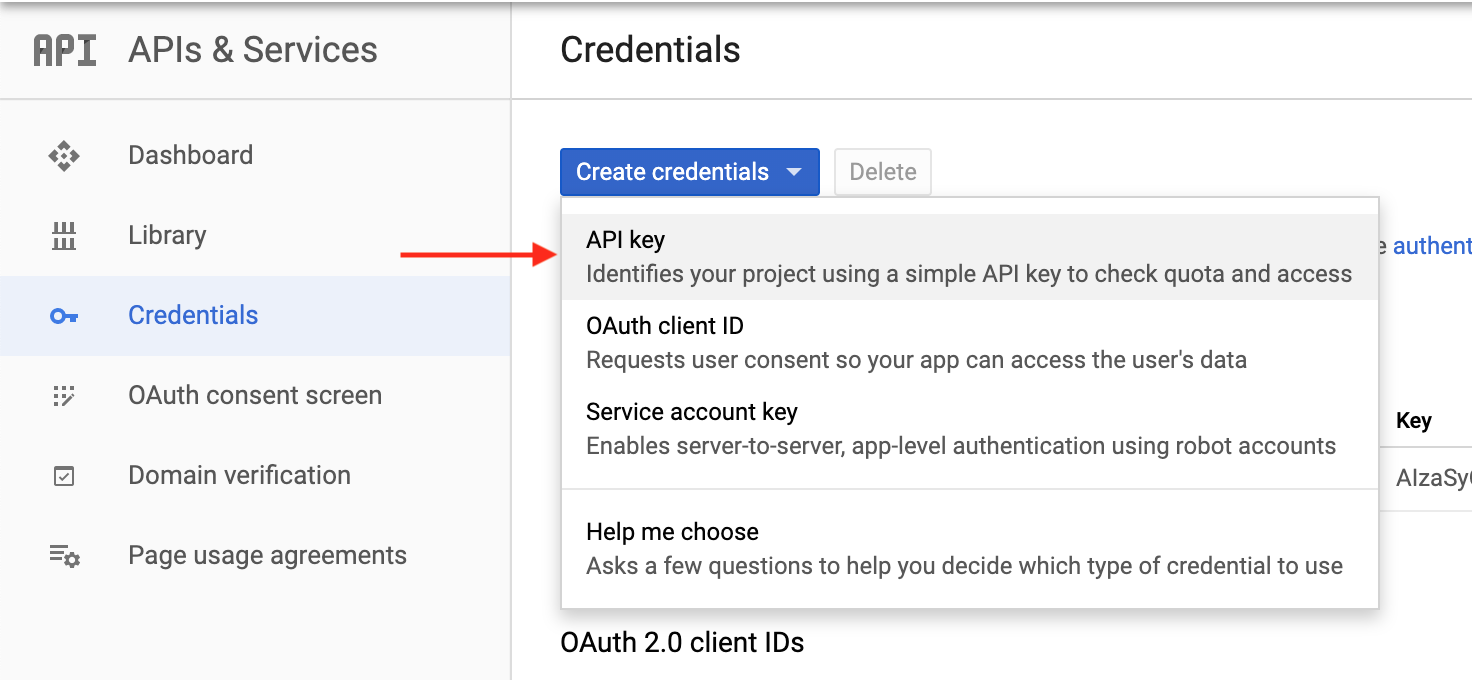
Navigate back to credentials. Click Create credentials and select API key from the dropdown.
Load Google API
Allow loading external scripts by updating the manifest.json:
{
  "name": "Extension with GAPI tutorial",
  ...
  "content_security_policy": "script-src 'self' https://apis.google.com/; object-src 'self'"
}
Add Google API script to your background.html file:
<html>
 <head>
  <title></title>
  <script src="background.js"></script>
 </head>
 <body></body>
 <script src="https://apis.google.com/js/client.js?onload=onGAPILoad"></script>
</html>
Update background.js to initialized gapi:
const API_KEY = 'API_KEY_FROM_PREVIOUS_STEP';
const DISCOVERY_DOCS = ["https://sheets.googleapis.com/$discovery/rest?version=v4"];

function onGAPILoad() {
  gapi.client.init({
    // Don't pass client nor scope as these will init auth2, which we don't want
    apiKey: API_KEY,
    discoveryDocs: DISCOVERY_DOCS,
  }).then(function () {
    console.log('gapi initialized')
  }, function(error) {
    console.log('error', error)
  });
}
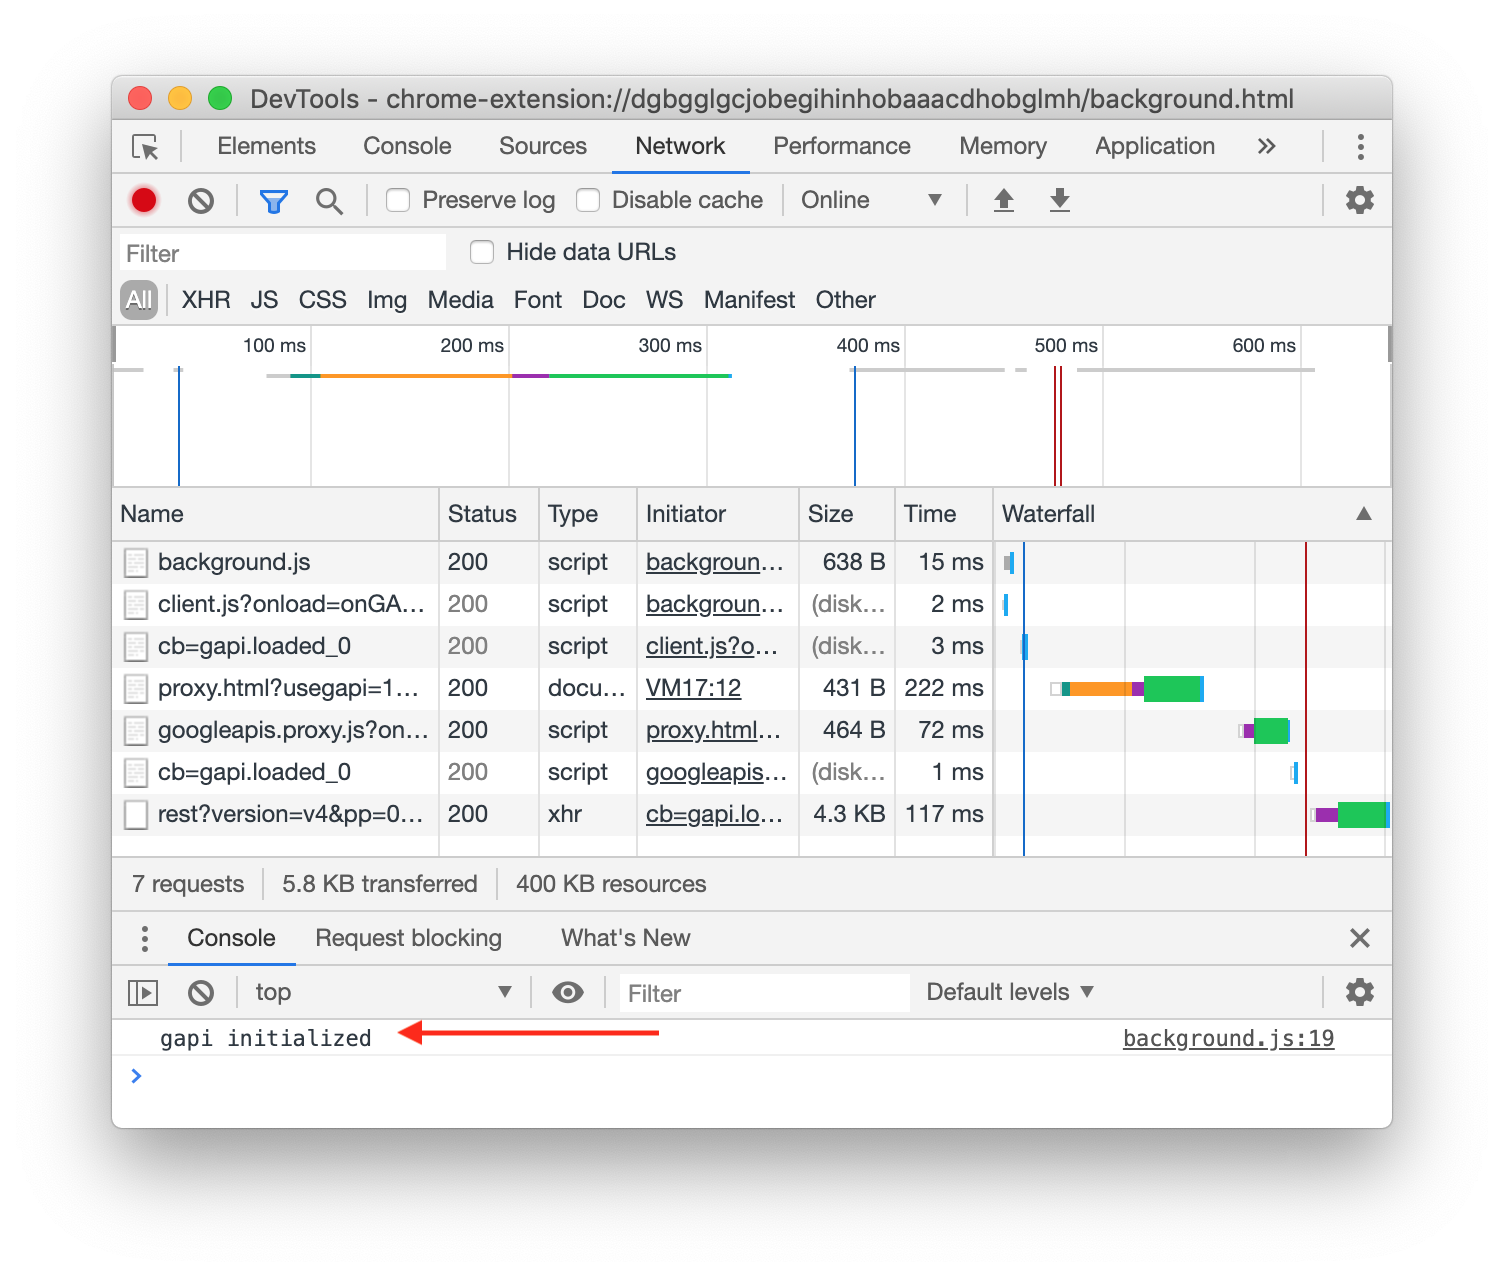
If you reload the extension and inspect background.html you should see gapi initialized in the console
Using Google API
In order to see that it’s working, we’re going to read the contents of a spreadsheet by updating background.js like this:
const API_KEY = 'API_KEY_FROM_PREVIOUS_STEP';
const DISCOVERY_DOCS = ["https://sheets.googleapis.com/$discovery/rest?version=v4"];
const SPREADSHEET_ID = 'YOUR_SPREADSHEET_ID';
const SPREADSHEET_TAB_NAME = 'main';

function onGAPILoad() {
  gapi.client.init({
    // Don't pass client nor scope as these will init auth2, which we don't want
    apiKey: API_KEY,
    discoveryDocs: DISCOVERY_DOCS,
  }).then(function () {
    console.log('gapi initialized')
    chrome.identity.getAuthToken({interactive: true}, function(token) {
      gapi.auth.setToken({
        'access_token': token,
      });

      gapi.client.sheets.spreadsheets.values.get({
        spreadsheetId: SPREADSHEET_ID,
        range: SPREADSHEET_TAB_NAME,
      }).then(function(response) {
        console.log(`Got ${response.result.values.length} rows back`)
      });
    })
  }, function(error) {
    console.log('error', error)
  });
}
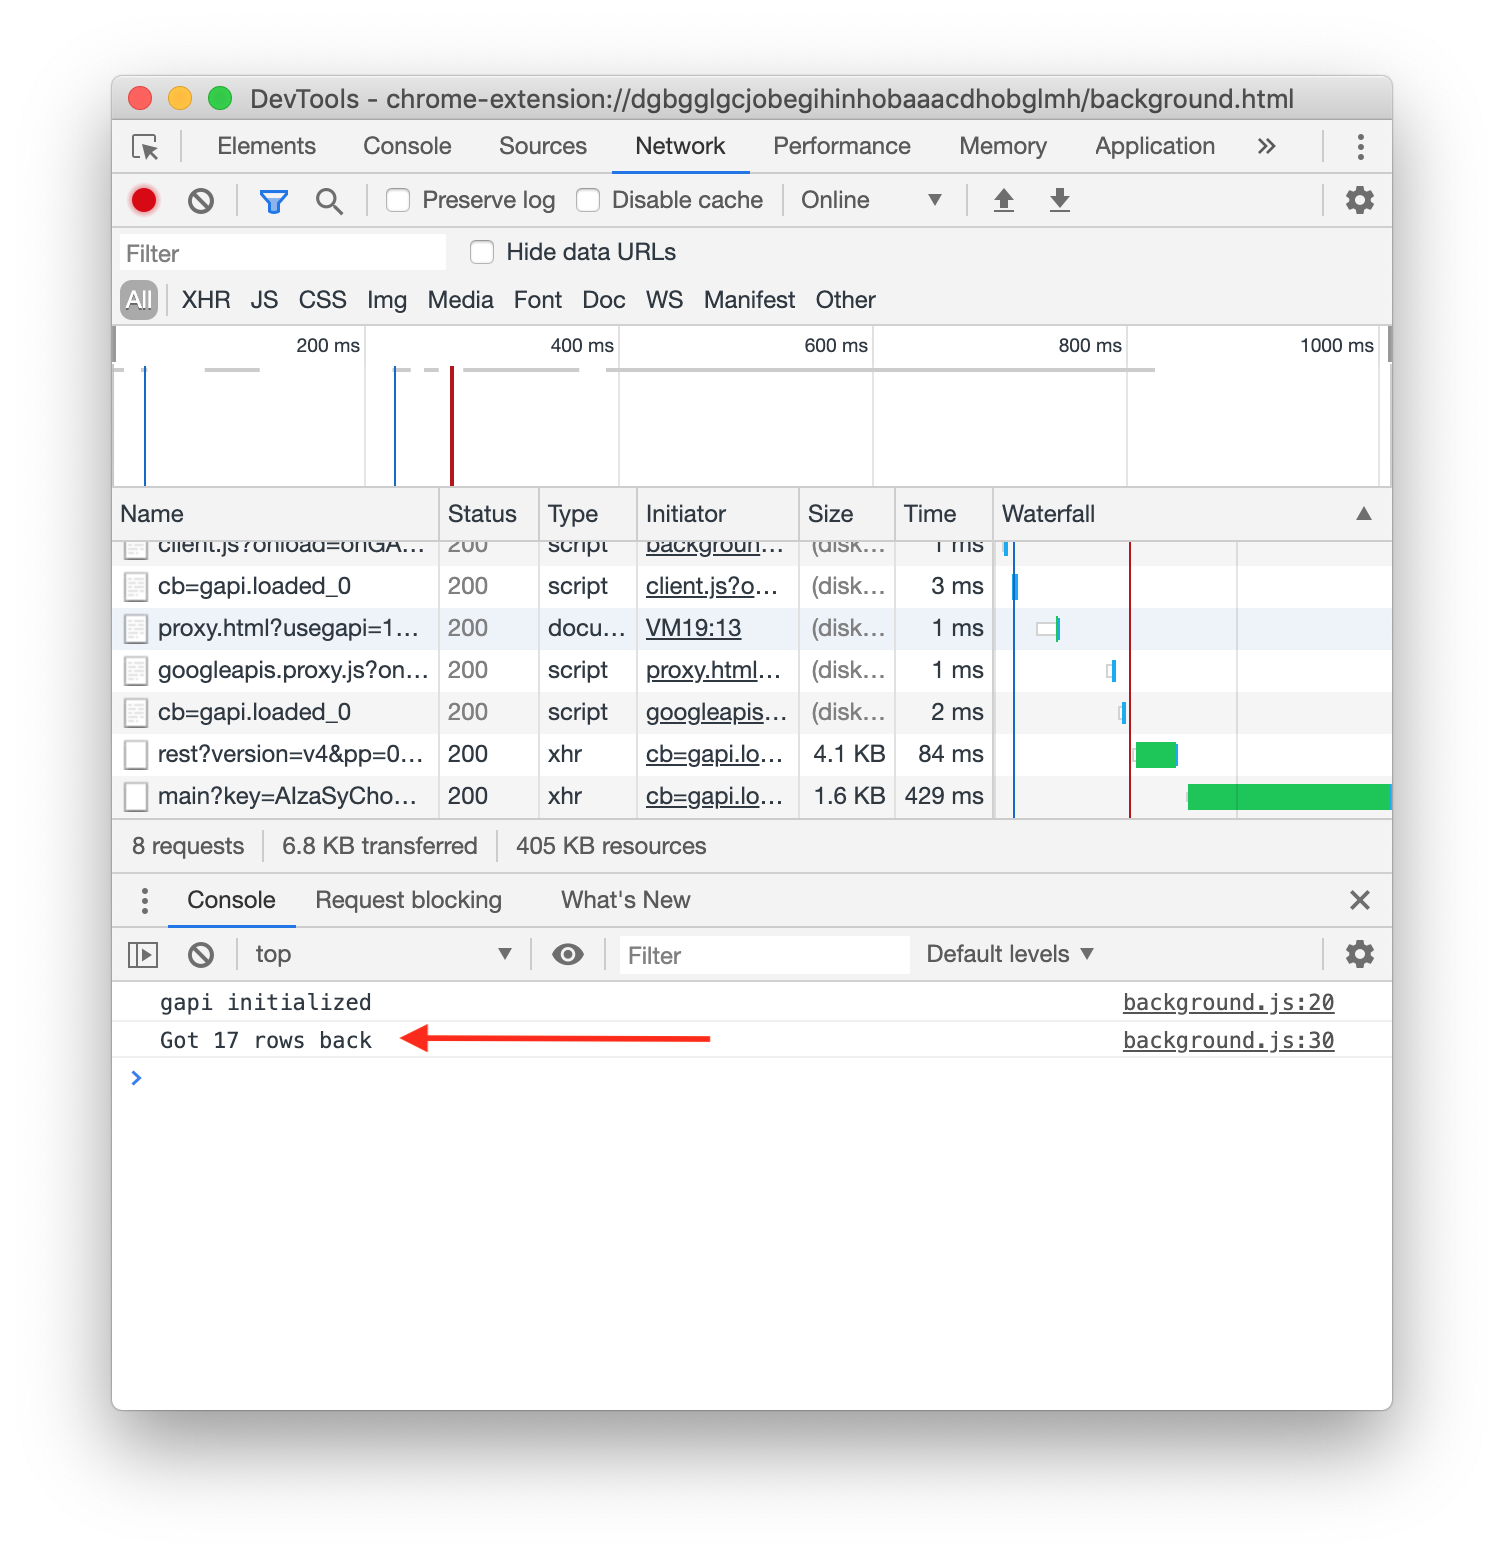
This should return the number of rows in the spreadtheet:
Adding data to spreadsheet with a click of a button
Let’s inject a script on this blog. Add "content_scripts" to your manifest.json:
{
  "name": "Extension with GAPI tutorial",
  ...
  "content_scripts": [
    {
      "matches": [
        "https://bumbu.me/*"
      ],
      "js": [
        "inject.js"
      ],
      "run_at": "document_end"
    }
  ]
}
And let’s create the inject.js file:
// Create the button
var button = document.createElement("button");
button.innerHTML = "Save to Google Spreadsheets";

// Append to header
var header = document.querySelector('.post__header');
header.appendChild(button);

// Add event handler
button.addEventListener ("click", function() {
  var data = {
    title: document.querySelector('.post__title').textContent,
    url: window.location.href,
  }
  chrome.runtime.sendMessage(data, function(response) {
    console.log('response', response);
  });
});
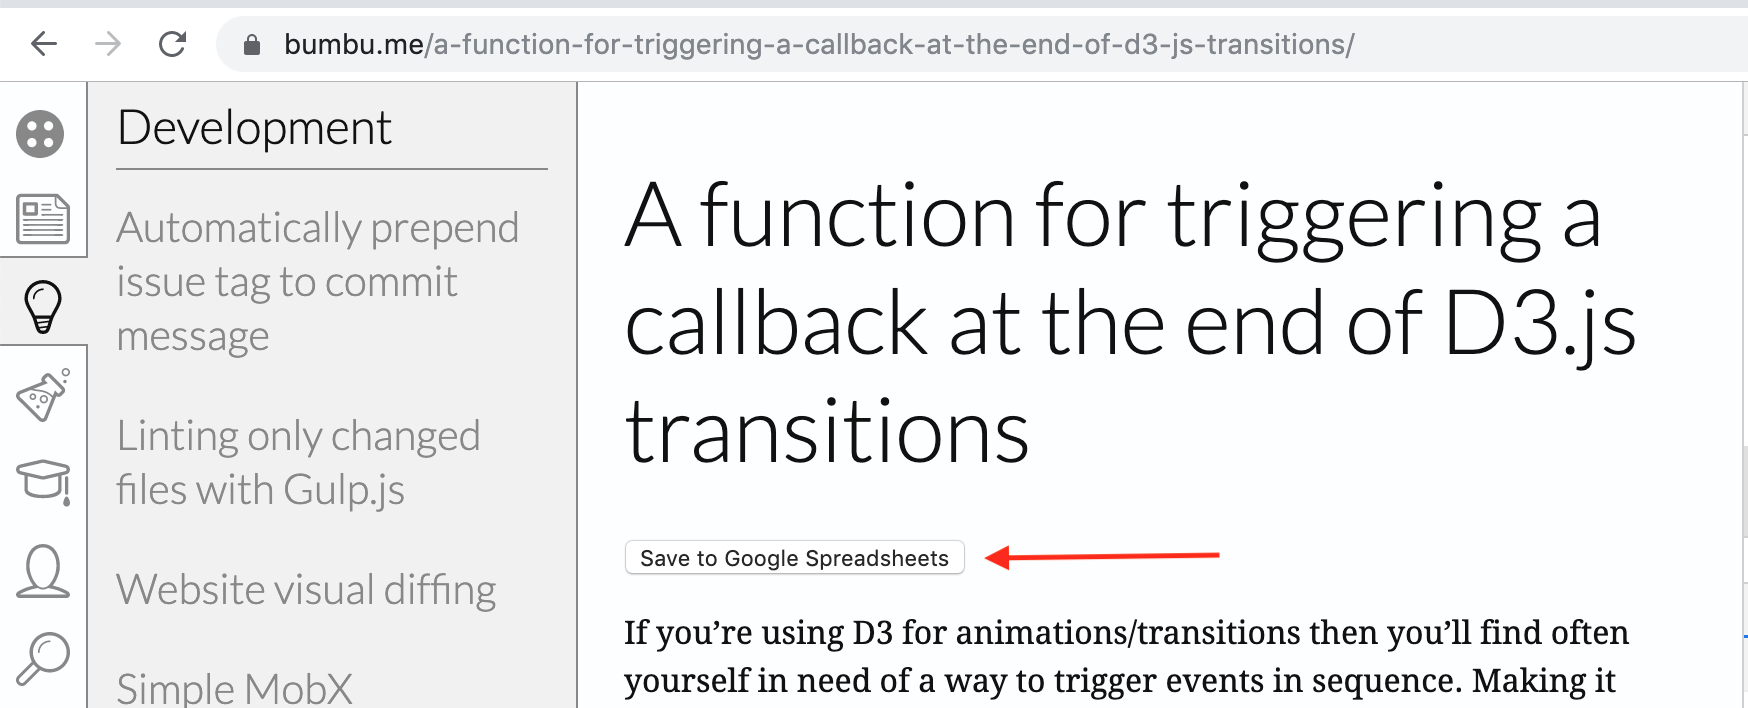
It will create a button under the page header (don’t forget to refresh the extension):
Now we need to process the message and save in the spreadsheet. For this update the background.js like this:
const API_KEY = 'API_KEY_FROM_PREVIOUS_STEP';
const DISCOVERY_DOCS = ["https://sheets.googleapis.com/$discovery/rest?version=v4"];
const SPREADSHEET_ID = 'YOUR_SPREADSHEET_ID';
const SPREADSHEET_TAB_NAME = 'main';

function onGAPILoad() {
  gapi.client.init({
    apiKey: API_KEY,
    discoveryDocs: DISCOVERY_DOCS,
  });
}

// Listen for messages from inject.js
chrome.extension.onMessage.addListener(
  function(request, sender, sendResponse) {
    // Get the token
    chrome.identity.getAuthToken({interactive: true}, function(token) {
      // Set GAPI auth token
      gapi.auth.setToken({
        'access_token': token,
      });

      const body = {values: [[
        new Date(), // Timestamp
        request.title, // Page title
        request.url, // Page URl
      ]]};

      // Append values to the spreadsheet
      gapi.client.sheets.spreadsheets.values.append({
        spreadsheetId: SPREADSHEET_ID,
        range: SPREADSHEET_TAB_NAME,
        valueInputOption: 'USER_ENTERED',
        resource: body
      }).then((response) => {
        // On success
        console.log(`${response.result.updates.updatedCells} cells appended.`)
        sendResponse({success: true});
      });
    })

    // Wait for response
    return true;
  }
);
Don’t forget to refresh the extension in Extensions Management page.
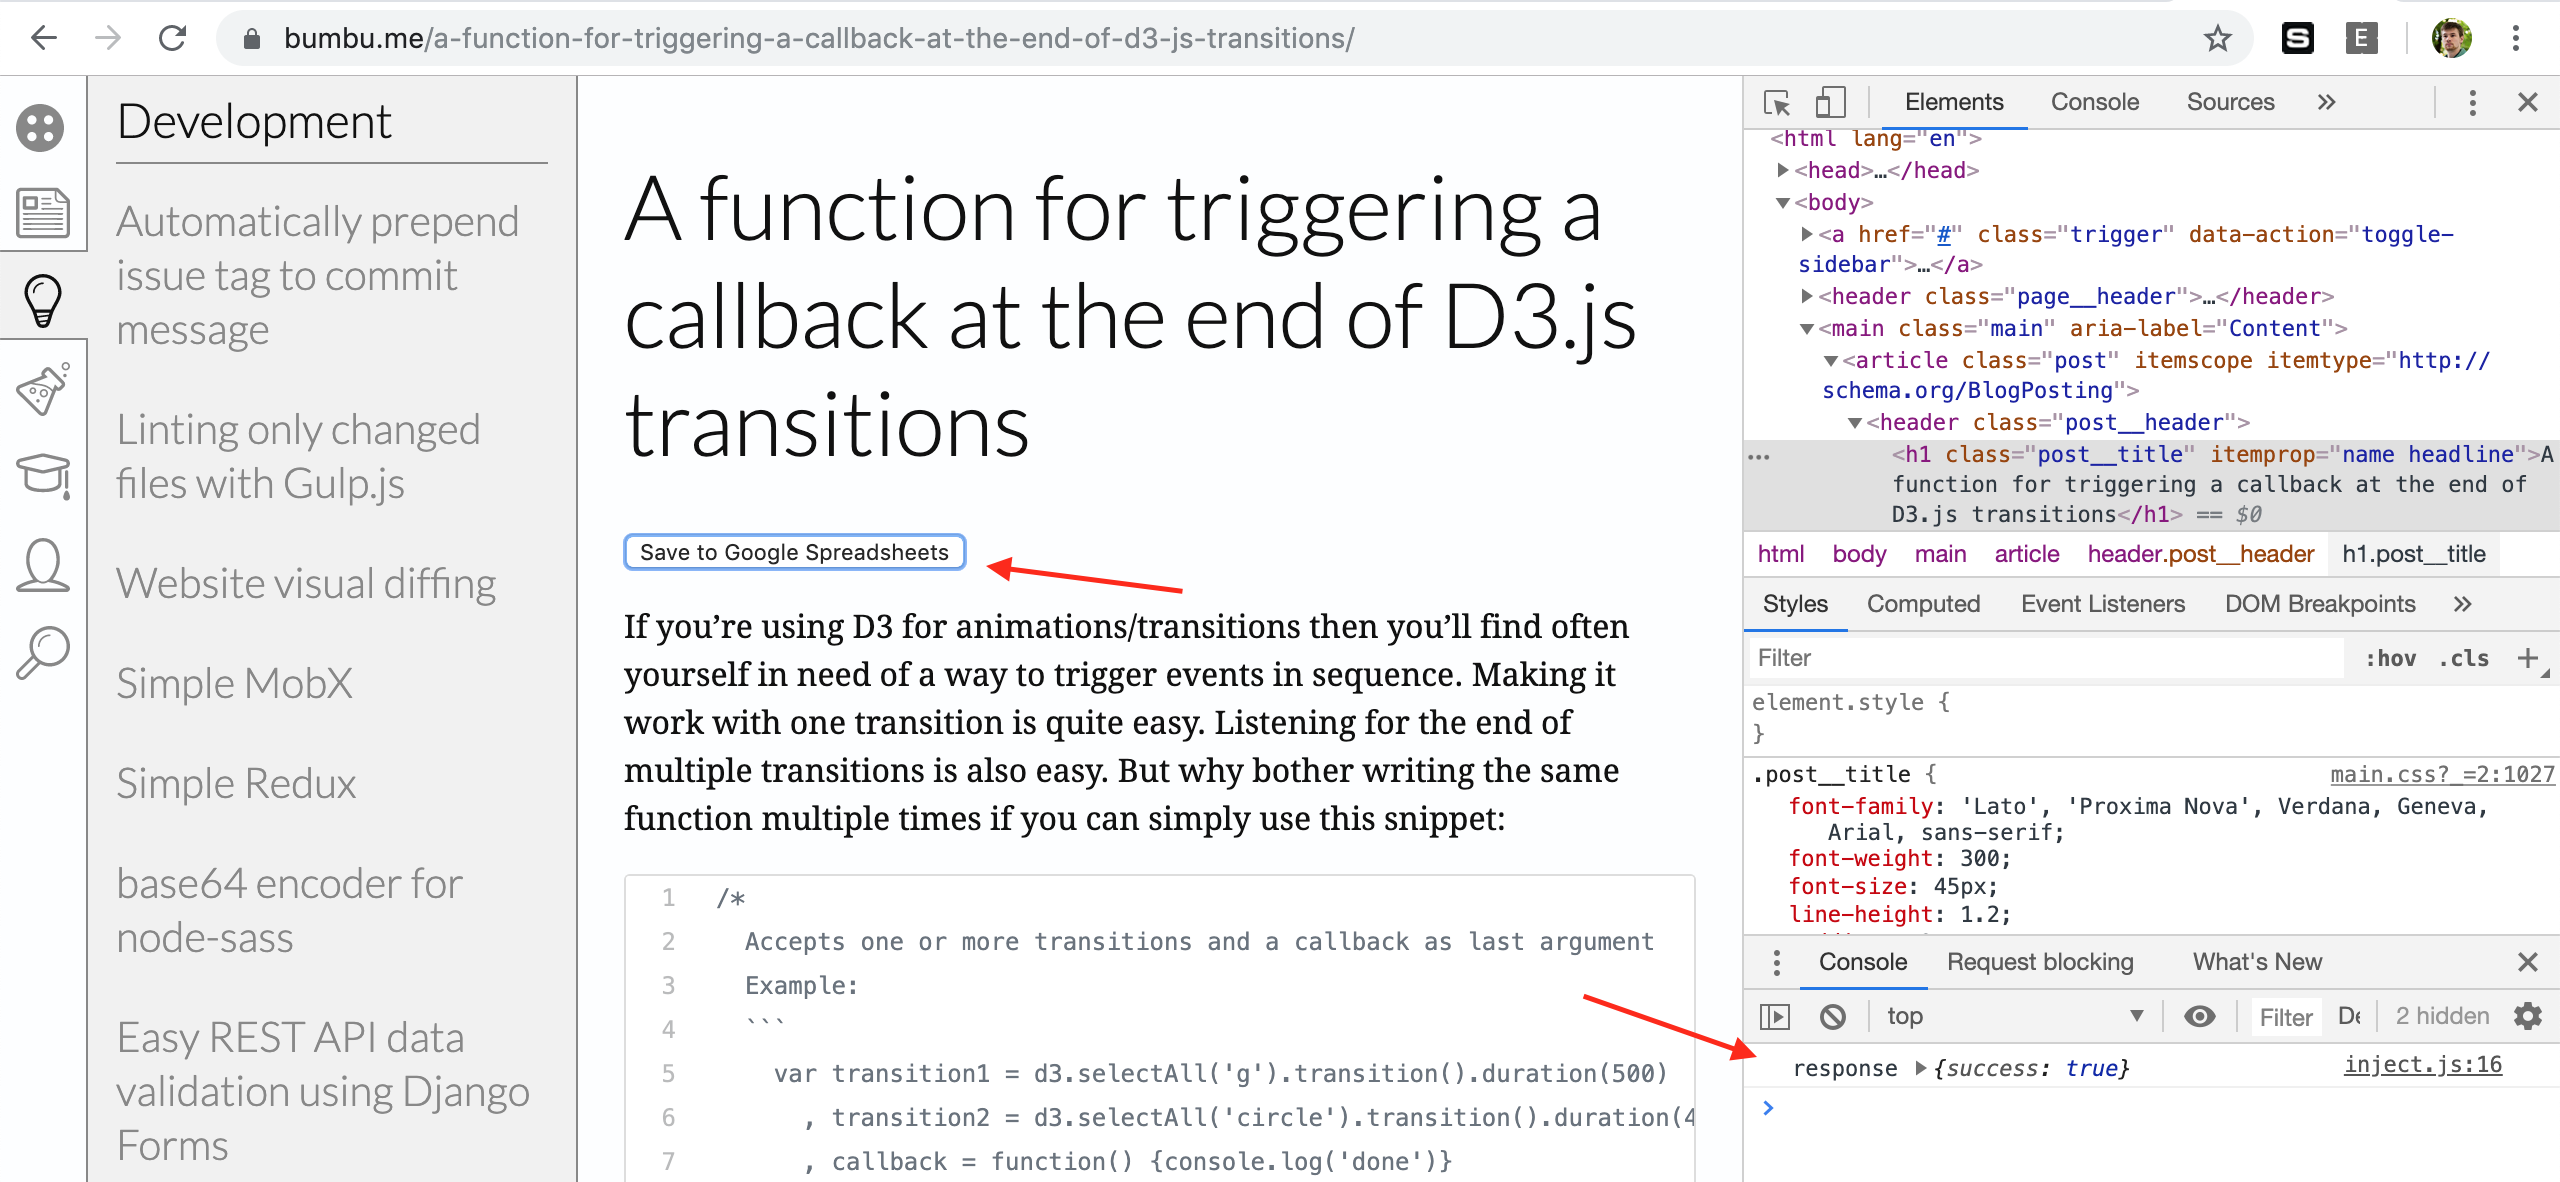
Now when clicking on the button, you should the success output in the console.
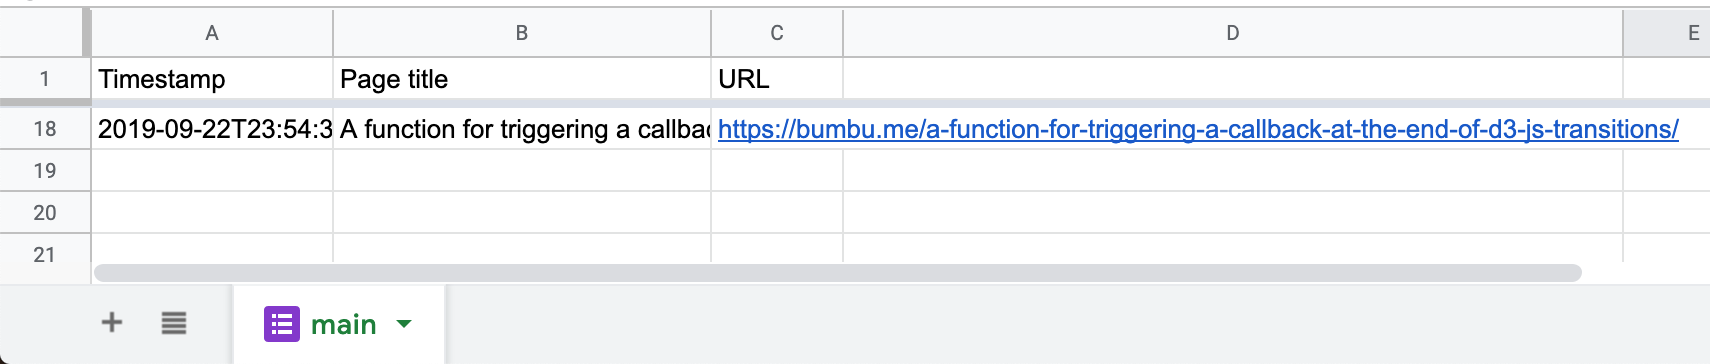
And if you open your spreadsheet, you should see the newly added row:
Download full example
You can download the full example from here.